

Bold, brothy taco soup hits the table fast and disappears even faster. It’s the kind of bowl that tastes like it simmered all afternoon, even though the whole thing comes together in about 35 minutes. The broth stays lively and spoonable, the beef gives it enough backbone to feel like dinner, and the toppings do the rest: sharp cheddar, cool sour cream, salty chips, and whatever else you pile on top.
What makes this version work is the balance. The taco seasoning brings the familiar Tex-Mex base, but the ranch mix adds a little tang and a savory edge that keeps the soup from tasting flat. Using both black beans and kidney beans gives you a mix of textures, while Rotel and diced tomatoes build a bright, chunky broth without extra fuss. It’s hearty, but it still eats like soup, not a bowl of chili wearing a different name.
Keep reading for the small details that matter here, especially how to keep the broth from turning muddy and how to adjust the thickness if you want it a little heartier. The topping choices matter more than you might think, too, and I’ve included the ones that make each bowl better.
The broth thickened up just enough after simmering, and the combo of ranch mix with taco seasoning gave it a deeper taste than my usual taco soup. My husband went back for seconds and asked me to pack the leftovers for lunch.
Save this taco soup for the nights when you want a fast Tex-Mex dinner with hearty beans, bold broth, and plenty of crunchy toppings.
The Trick to Taco Soup That Tastes Full-Bodied, Not Watery
The biggest mistake with taco soup is treating it like a dump-and-go broth and expecting the seasoning packets to do all the work. They won’t. If the soup tastes thin, the problem is usually that the beef wasn’t browned enough or the liquid ratio got pushed too far. You want a pot that looks loose enough to ladle, but still has enough body from the beans, tomatoes, and beef to coat the spoon.
Brown the beef until it loses its gray color and starts picking up a little fond on the bottom of the pot. That browned layer matters. Then let the onions soften in the same pot before the garlic goes in for just a minute. Garlic burns fast, and burnt garlic makes the whole pot taste sharp and bitter.
What Each Ingredient Is Actually Doing in This Bowl

- Ground beef — This is the base flavor and the thing that makes the soup feel substantial. An 80/20 blend gives the best flavor, but any ground beef works. If yours is very lean, don’t skip draining only after browning; you need enough fat left behind to help the onions cook.
- Onion and garlic — These build the savory backbone before the liquids go in. Diced onion softens into the broth, while garlic adds depth in the last minute of sautéing. If the garlic goes in too early, it can scorch and turn bitter.
- Black beans and kidney beans — The mix gives you better texture than using one bean alone. Black beans stay softer and creamier, while kidney beans hold their shape. Canned beans are perfect here as long as they’re drained well.
- Rotel and diced tomatoes — Rotel brings the chiles and a little heat, while the plain diced tomatoes keep the soup from becoming too spicy or too salty. Together they create the bright tomato base that makes the broth taste finished.
- Taco seasoning and ranch dressing mix — This is the flavor trick that makes people ask what’s different. Taco seasoning gives you the cumin-chili base, and ranch mix adds tang, herbs, and a savory note that rounds out the soup. Use the full packets for the intended balance.
- Broth — Use beef broth if you want a deeper, meatier result. Chicken broth keeps it a little lighter and still works well. Either way, broth is better than water here because it carries the seasoning instead of thinning it out.
Building the Pot in the Right Order
Browning the Beef First
Start with a large pot over medium-high heat and cook the ground beef until it’s browned and no pink remains. If there’s a lot of fat in the pot, drain it off, but leave enough behind that the onions can sauté without sticking. A good brown on the meat gives the soup a richer base than gray, steamed beef ever will.
Softening the Onion and Garlic
Add the diced onion to the same pot and cook it for about 3 minutes, scraping up the browned bits as it softens. Once the onion looks translucent at the edges, add the garlic and cook for 1 minute. The garlic should smell fragrant, not toasted. If it darkens, the pot will pick up a bitter edge that won’t disappear later.
Letting the Soup Simmer Into Itself
Stir in the beans, corn, tomatoes, seasoning packets, and broth, then bring the pot to a boil before lowering it to a simmer. Let it go for 15 to 20 minutes so the flavors meld and the broth takes on a deeper color. If it still tastes flat at the end, it usually needs salt, not more seasoning packets.
Finishing With the Toppings
Ladle the soup into bowls and add the toppings while it’s hot. Shredded cheddar melts into the broth, sour cream cools the heat, and tortilla chips add crunch that keeps each bite from feeling one-note. Add jalapeños, cilantro, or avocado based on how much heat and freshness you want on top.
How to Change the Bowl Without Losing the Point of the Soup
Make It Lighter With Ground Turkey
Swap the ground beef for ground turkey if you want a leaner soup. Turkey has a milder flavor, so the seasoning packets matter even more here, and you may want the beef broth version to keep the pot from tasting thin. Brown it the same way and don’t overcook it before the liquids go in.
Make It Dairy-Free
The soup itself is already dairy-free as written, so the main change is in the toppings. Skip the cheddar and sour cream, then finish with avocado, cilantro, extra tortilla chips, and a squeeze of lime if you want a brighter bowl. You won’t lose the core flavor at all.
Make It Thicker and More Chili-Like
Let the soup simmer uncovered for the last 5 to 10 minutes if you want a heartier texture. That reduces the broth and concentrates the seasoning without changing the ingredient list. You can also mash a small scoop of beans against the side of the pot to give the broth a little more body.
Storage and Reheating
- Refrigerator: Store in an airtight container for up to 4 days. The broth thickens a little as it sits, which is normal.
- Freezer: It freezes well for up to 3 months. Cool it completely first, then portion it into freezer-safe containers, leaving a little room for expansion.
- Reheating: Warm it gently on the stove over medium-low heat or in the microwave in short bursts, stirring in between. If it thickened too much in the fridge, splash in a little broth before reheating instead of trying to power through high heat.
Answers to the Questions Worth Asking
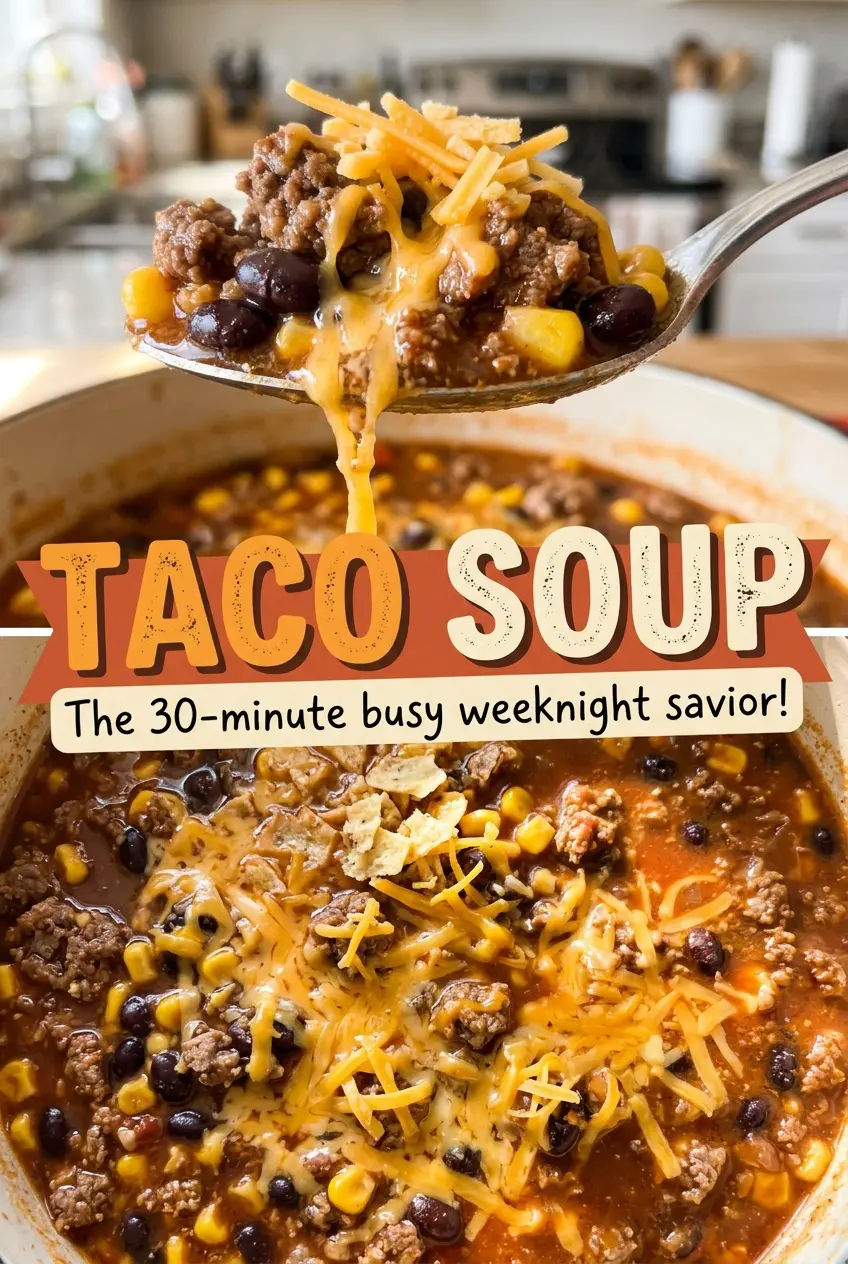
Taco Soup
Ingredients
Taco soup base
- 1 lb ground beef
- 1 onion
- 3 garlic
- 15 oz black beans drained
- 15 oz kidney beans drained
- 15 oz corn drained
- 10 oz Rotel diced tomatoes with green chiles
- 14 oz diced tomatoes
- 1 oz taco seasoning packet
- 1 oz ranch dressing mix packet
- 4 cup beef or chicken broth
Toppings
- 0.5 cup shredded cheddar
- 0.5 cup sour cream
- 1 cup tortilla chips crushed
- 1 jalapeños sliced
- 0.25 cup cilantro
- 1 avocado
Equipment
- 1 Dutch oven
Instructions
Brown the beef
- Brown the ground beef in a large pot over medium-high heat, stirring until cooked through, then drain the fat.
- Keep the pot handy so you can sauté the vegetables in the same drippings after the beef is drained.
Sauté onion and garlic
- Sauté the onion in the same pot for 3 minutes, until softened.
- Add the garlic and cook for 1 minute, stirring so it doesn’t brown.
Simmer the soup
- Add all canned ingredients, both seasoning packets, and the broth to the pot, then stir to combine.
- Bring the mixture to a boil, then reduce heat and simmer for 15-20 minutes until the flavors meld.
Season and serve
- Taste the soup and adjust seasoning with salt and pepper.
- Serve topped with shredded cheddar, sour cream, crushed tortilla chips, jalapeños, cilantro, and avocado.